Look at your reflection in a storefront window. Notice anything? Most people don't realize their shoulders have crept forward until someone points it out—or until that dull ache between the shoulder blades becomes their constant companion.
I'll be straight with you: fixing posture isn't about remembering to "sit up straight." That advice exhausts you within fifteen minutes. The real solution? Rebuilding the muscles that hold you upright automatically, the way your body was designed to work before eight-hour desk marathons became the norm.
The encouraging part: your body responds fast when you give it the right stimulus. Consistent posture correction exercises can reverse damage that took years to accumulate, usually within weeks.
Why Your Posture Deteriorates (And What Happens When You Ignore It)
Think of your skeleton like stacked blocks. When everything lines up—ears over shoulders, shoulders over hips—gravity flows straight down through the bones. Your muscles barely work to keep you vertical.
Then life happens. You spend forty hours weekly hunched over a keyboard. Your hip flexors get stuck in a shortened position from all that sitting. The muscles across your chest tighten up because your arms constantly reach forward for typing, mouse work, and phone scrolling. Meanwhile, the muscles between your shoulder blades? They're stretched like worn-out elastic bands, too weak to pull your shoulders back where they belong.
Your head starts drifting forward. Maybe just an inch at first. But here's the problem: your head weighs about twelve pounds. Each inch it moves forward adds roughly ten pounds of stress to your neck. Suddenly your neck muscles are supporting what feels like thirty or forty pounds instead of twelve.
Author: Jessica Taylor;
Source: thelifelongadventures.com
Your spine curves to compensate. The curve in your neck gets deeper. Your upper back rounds into that hunched shape you've seen in old photographs. Your ribcage can't expand properly anymore—some studies show lung capacity drops by thirty percent in severe cases. You might notice you can't take a really deep breath without effort.
This creates a vicious cycle. Weak muscles get weaker from disuse. Tight muscles develop trigger points and lose flexibility. Worse, your nervous system starts treating this distorted position as "normal." When you try to stand up straight, it actually feels wrong and uncomfortable.
Ignore this long enough and you're looking at real problems. Compressed nerves cause tingling in your arms. Joint compression leads to constant neck and back pain that over-the-counter meds barely touch. Turning your head to check your blind spot becomes genuinely difficult. Tension headaches show up weekly—sometimes daily—as those tiny muscles at the base of your skull stay locked in contraction.
Even your digestion suffers. When your torso collapses forward, it compresses your abdominal organs. People dealing with chronic digestive issues rarely connect the dots back to posture.
Any effective spinal health workout needs to tackle all these connected problems at once—loosening what's tight, strengthening what's weak, and retraining your nervous system.
The 5-Minute Daily Routine for Desk Workers
Here's the good news: you don't need a gym membership or to change into workout clothes. These desk posture exercises fit into your workday using just your chair and a few minutes of focus.
Exercises You Can Do While Sitting
Seated Scapular Squeezes: Scoot to the edge of your chair, feet flat on the floor. Now imagine you're pinching a pencil between your shoulder blades. Squeeze them together—not hard, just firm—and hold that for five seconds. Let it go completely. Do twelve of these every couple hours. You're waking up the rhomboids and mid-traps, muscles that have been on vacation most of your career.
Chin Tucks: Put two fingers on your chin. Push gently backward, sliding your chin straight back until you've got that "double chin" look going. Keep looking straight ahead—don't tilt your head down. Hold ten seconds. You'll feel it stretching at the base of your skull. Those deep neck flexors you're engaging? They stabilize your neck vertebrae but rarely get activated during normal computer work. Do ten reps mid-morning and another ten mid-afternoon.
Author: Jessica Taylor;
Source: thelifelongadventures.com
Seated Thoracic Rotation: Sit tall with arms crossed over your chest. Keep your hips facing forward and rotate your upper body to the right as far as comfortable. Stay there for three full breaths. Come back to center and go left. This maintains the rotational ability in your mid-back, which stiffens up fast when you're locked in one position all day. Five rotations each direction.
Hip Flexor Pulses: Slide forward in your chair. Lift one knee slightly off the seat by engaging your hip flexor, then deliberately relax and let it drop. You're not stretching here—you're teaching those chronically tight hip flexors to let go on command. Twenty pulses per leg helps break up the sustained contraction they maintain during extended sitting.
Standing Stretches for Between Meetings
Doorway Chest Opener: Stand in a doorway with your forearms against the frame, elbows bent ninety degrees. Step one foot through the doorway until you feel a moderate stretch across the front of your shoulders. Hold thirty seconds. Your pec major and minor pull your shoulders forward when they're tight. This opens up your chest immediately.
Standing Cat-Cow: Put both hands on your desk with straight arms, walk your feet back until your torso is nearly parallel to the ground. Arch your spine, lifting your chest and tailbone up (cow). Then round your spine completely, tucking your pelvis and dropping your head (cat). Move slowly through eight cycles, trying to move one vertebra at a time. You're mobilizing your entire spine through its full range of motion.
Wall Angels: Stand with your back against a wall, feet about six inches out. Try to flatten your lower back, upper back, and head against the wall. Raise your arms in a "goal post" position and attempt to keep your forearms and backs of hands touching the wall. Slowly slide your arms up overhead while maintaining contact. Most people can't keep everything touching—that's precisely the point. It shows you exactly where your mobility restrictions and shoulder blade control deficits are. Eight slow reps.
These posture correction exercises take five minutes total. Set three phone reminders throughout your day. Frequency beats duration here—you're interrupting bad patterns before they compound.
Complete Back Strengthening Workout for Long-Term Posture Support
Those quick desk breaks prevent things from getting worse. But actually rebuilding the muscular foundation that supports good posture? That takes dedicated twenty-five to thirty minute sessions, two to three times weekly. This back strengthening exercises routine hits every muscle group involved in keeping you upright.
First learn control, then learn to apply it.
— Pilates (Joseph Pilates)
Upper Back and Shoulder Blade Activation
Prone Y-Raises: Lie face-down on the floor with arms extended overhead in a Y-shape, thumbs pointing up. Lift your arms off the floor while squeezing your shoulder blades together and down. Hold at the top for two seconds. Lower with control. Start with two sets of twelve. These specifically hit your lower trap fibers, which are universally weak in people with forward head posture.
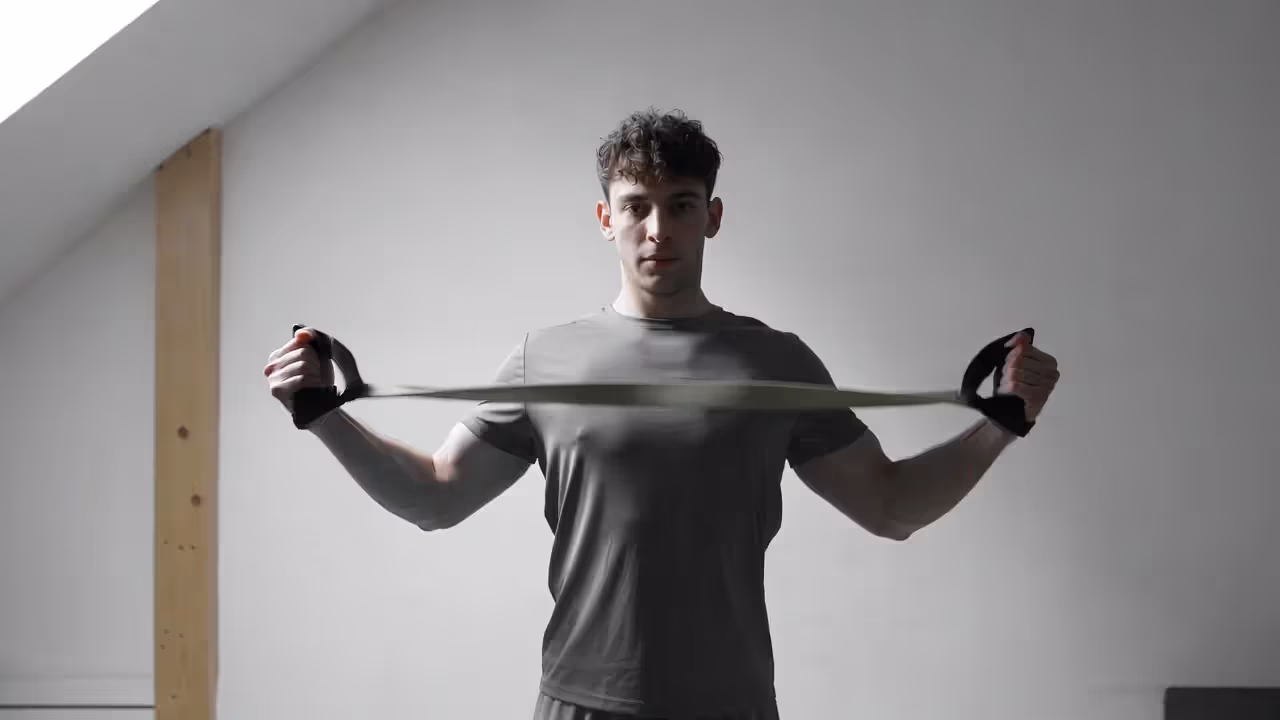
Band Pull-Aparts: Hold a resistance band at chest height with straight arms, hands shoulder-width apart. Pull the band apart by moving your hands out to the sides while squeezing your shoulder blades together. Your arms stay at the same height the whole time. Three sets of fifteen. This builds strength in your mid-traps and rhomboids while teaching proper shoulder blade retraction.
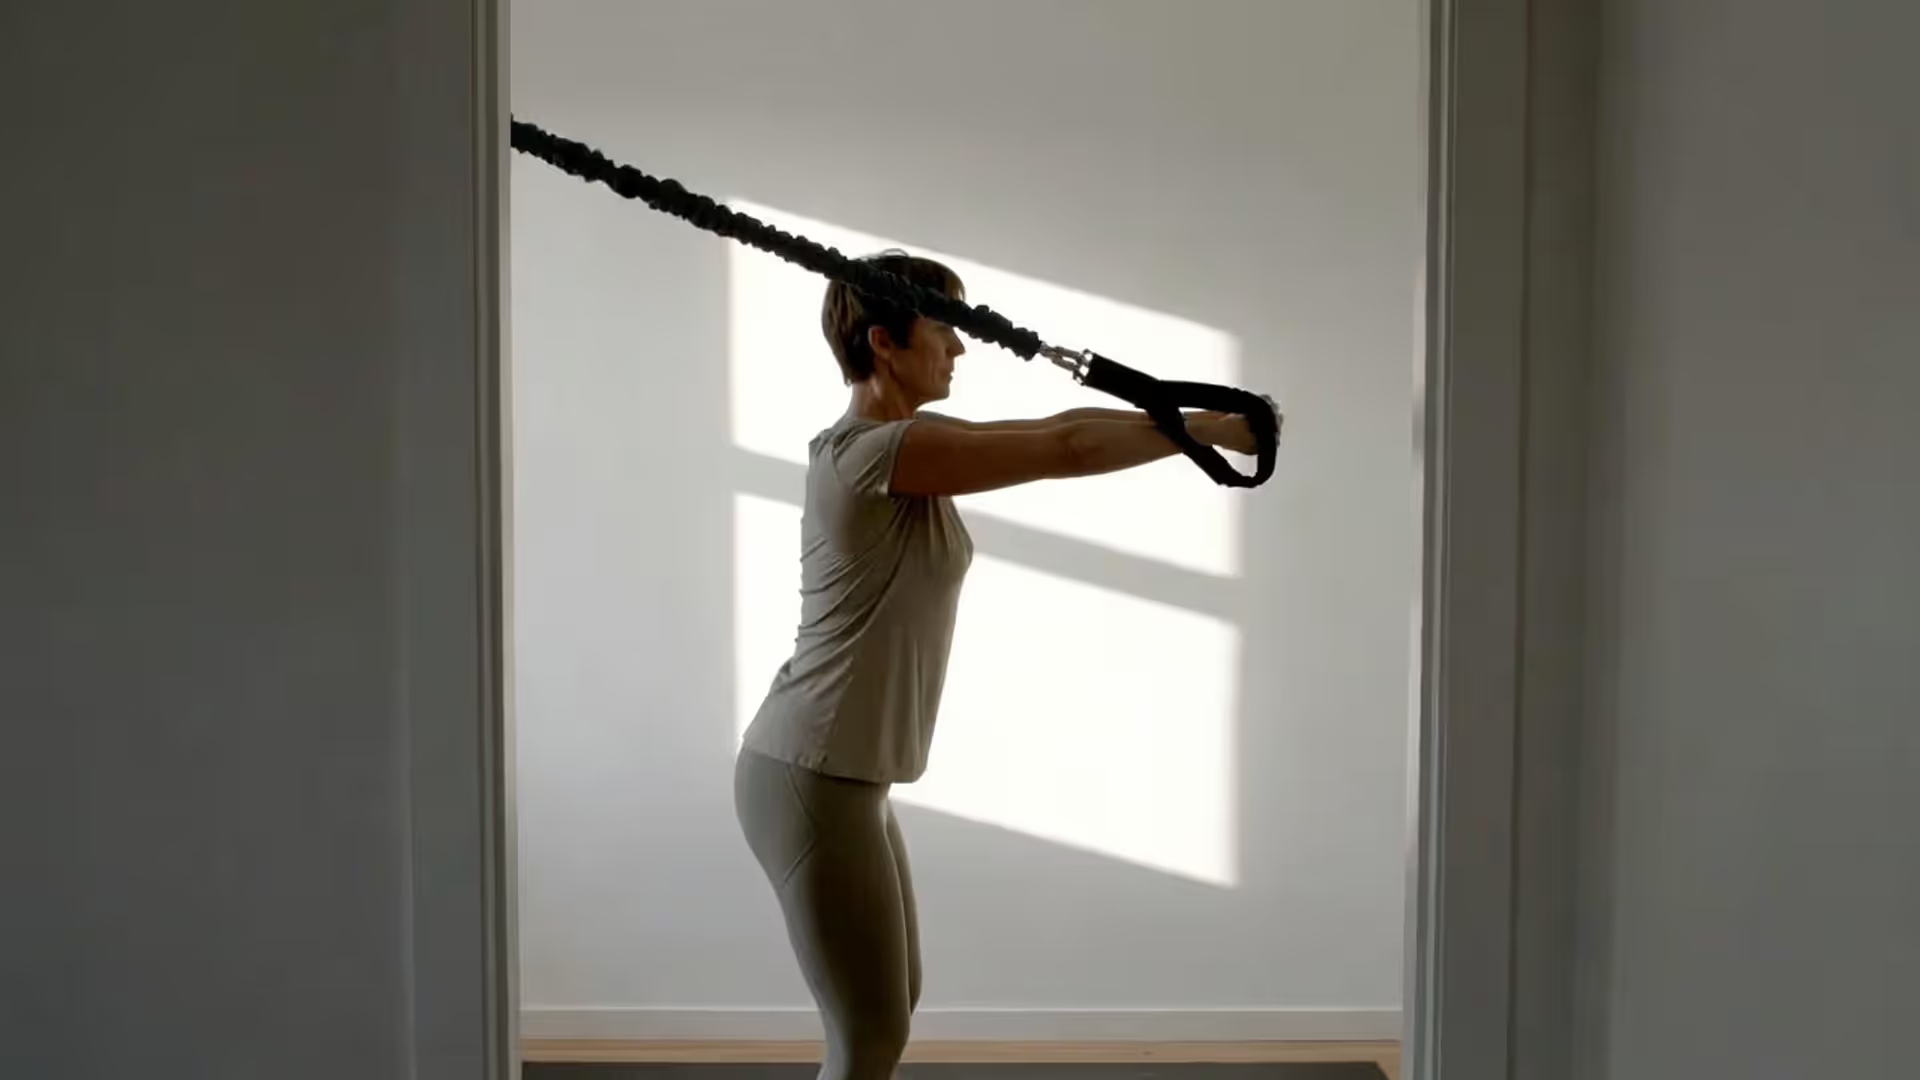
Face Pulls: Anchor a resistance band at head height to something stable. Grab both ends and walk back until there's tension. Pull the band toward your face, separating your hands as they approach your head, ending with your hands by your ears and elbows flared out. This works your rear delts and external rotators that counteract the internal rotation from keyboard work. Three sets of twelve.
Wall Slides: Back against a wall, form a "W" with your arms—elbows bent, backs of hands on the wall if possible. Slide your arms up the wall toward straight, trying to maintain contact. Come back down to the W. This combines mobility work with shoulder blade upward rotation training. Two sets of ten, prioritizing smooth movement over forcing range you don't have.
Author: Jessica Taylor;
Source: thelifelongadventures.com
Lower Back and Core Stability Movements
Bird Dogs: Start on all fours with a neutral spine. Extend your right arm straight out in front while simultaneously sending your left leg straight back behind you. Think about making your arm and leg as long as possible, forming one continuous line through your torso. Hold five seconds without letting your hips twist or your lower back arch. Return to start and switch sides. You're building anti-rotation stability—your core's ability to resist unwanted movement. Three sets of eight per side.
Dead Bugs: Lie on your back with arms reaching toward the ceiling, knees bent at ninety degrees with shins parallel to the floor. Press your lower back into the floor. Slowly lower your right arm overhead while straightening your left leg, hovering it just above the ground. Come back to start and switch sides. The crucial part is keeping your lower back glued to the floor the entire time. Three sets of ten per side.
Glute Bridges: Lie on your back with knees bent, feet flat and hip-width apart. Squeeze your glutes and lift your hips off the floor. At the top, you want a straight diagonal line running from your knees down through your hips to your shoulders. Hold there for two seconds. Lower under control. Strong glutes support proper pelvic alignment, preventing that anterior tilt that contributes to lower back pain. Three sets of fifteen.
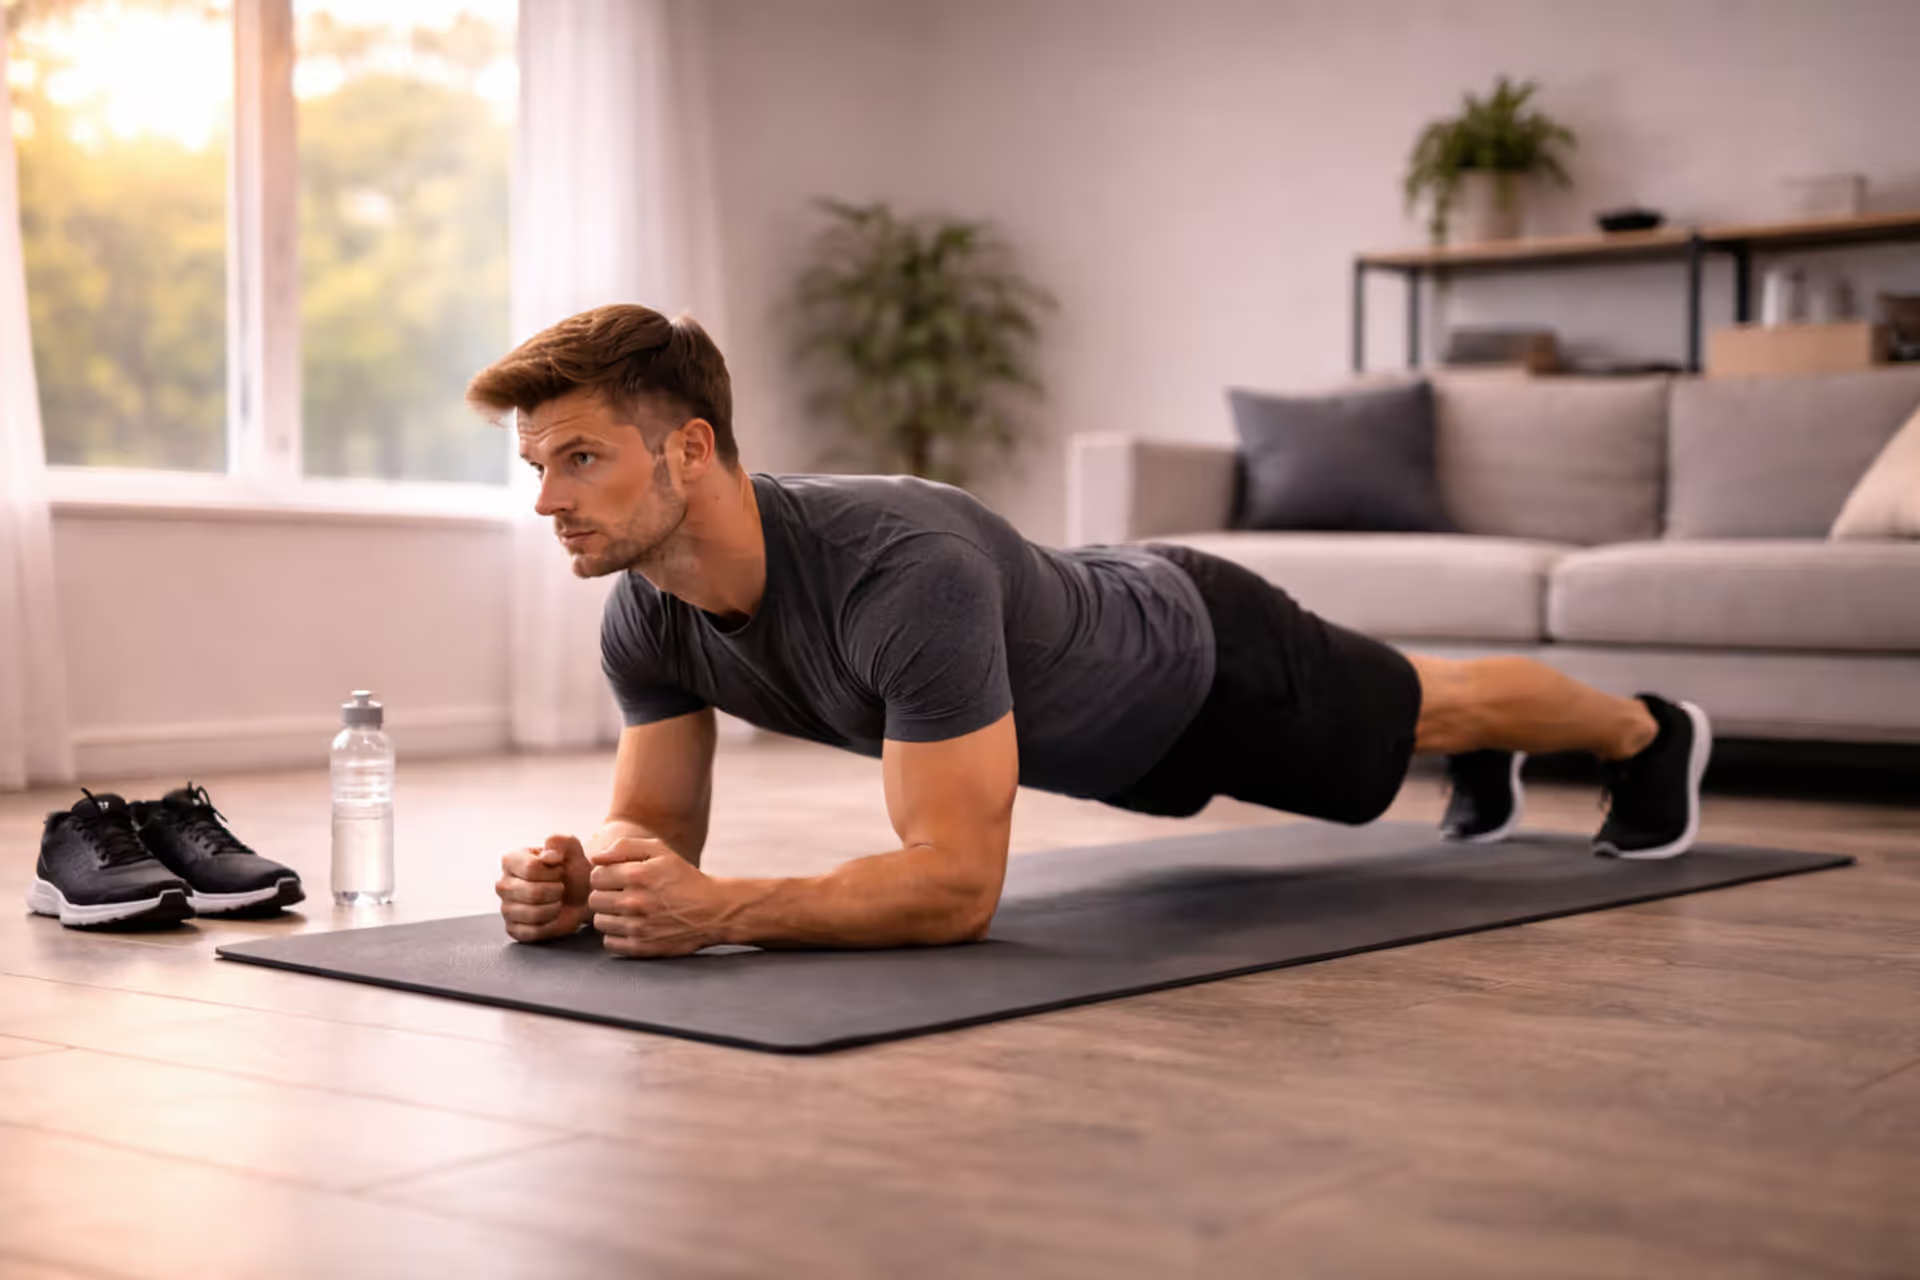
Planks with Shoulder Taps: Hold a forearm plank with your feet slightly wider than hip-width. Without letting your hips shift, lift your right hand and tap your left shoulder. Place it back down and repeat with the left hand. This adds an anti-rotation challenge to standard planks. Work toward three sets of twenty total taps.
Posture is the best medicine.
— Pilates (Joseph Pilates)
Hip Flexor and Chest Opening Stretches
Half-Kneeling Hip Flexor Stretch: Kneel on your right knee with your left foot forward, left knee bent ninety degrees. Tuck your pelvis under (posterior tilt) and shift your weight forward until you feel the stretch in your right front hip. Raise your right arm overhead and lean slightly to the left to intensify it. Hold ninety seconds per side. This extended hold time allows the chronically tight psoas to actually release rather than just temporarily lengthen.
Thread the Needle: Start on hands and knees. Take your right arm and thread it under your left arm, lowering your right shoulder and the right side of your head toward the floor. Your left hand can stay planted or reach forward for a deeper stretch. Hold sixty seconds per side. This gets at the muscles along your spine and between your ribs that become restricted from prolonged sitting.
Cobra Pose: Lie face-down with hands beside your ribs. Press into your hands and lift your chest while keeping your hips on the ground. Your elbows can stay slightly bent. Hold for thirty seconds while breathing deeply into the chest expansion. This extension counteracts the constant forward rounding your day forces on you and stretches the abdominal muscles, which can become adaptively shortened. Three holds.
Exercise
Target Muscles
Equipment
Difficulty
Reps/Duration
Prone Y-Raises
Lower traps, rear delts
None
Beginner
2 sets × 12 reps
Band Pull-Aparts
Mid-traps, rhomboids
Resistance band
Beginner
3 sets × 15 reps
Face Pulls
Rear delts, external rotators
Resistance band
Intermediate
3 sets × 12 reps
Wall Slides
Serratus anterior, upward rotators
None
Beginner
2 sets × 10 reps
Bird Dogs
Core stabilizers, spinal erectors
None
Beginner
3 sets × 8 reps each side
Dead Bugs
Deep abdominals, obliques
None
Intermediate
3 sets × 10 reps each side
Glute Bridges
Glutes, hamstrings
None
Beginner
3 sets × 15 reps
Planks with Taps
Entire core, anti-rotation
None
Intermediate
3 sets × 20 total taps
Hip Flexor Stretch
Psoas, rectus femoris
None
Beginner
90 seconds each side
Cobra Pose
Abs, chest muscles
None
Beginner
3 sets × 30 seconds
How to Build a Weekly Posture Improvement Schedule
Random exercise gets random results. Smart programming speeds up your progress by balancing training stress, recovery, and gradual progression.
First, understand that daily desk posture exercises are non-negotiable. These five-minute blocks don't create training fatigue—they're pattern interruption, not conditioning workouts. Do them every workday regardless of your other training.
Add your posture workout routine on top of that foundation. During weeks one and two, do the full back strengthening protocol twice weekly with at least two days between sessions. Your muscles need recovery time to adapt and grow stronger. Monday and Thursday works for most schedules.
Each training session should feel challenging but not draining. You're building new motor patterns, which requires focus and clean execution. When your form starts breaking down, you've done enough. Better to stop at eight quality reps than force out twelve sloppy ones that reinforce bad movement patterns.
Weeks three and four, bump up to three weekly sessions (Monday, Wednesday, Friday) while keeping the same exercises and rep schemes. The increased frequency helps solidify movement patterns without requiring maximal effort.
After the first month, start adding progression. Add five reps to each exercise, or increase band tension, or slow down your tempo (three-second lower, one-second pause, one-second lift). Pick one progression method and stick with it for the next four weeks.
Week
Frequency
Duration
Focus
Intensity
1-2
2 sessions per week
25-30 minutes
Learning proper form, establishing baseline
Moderate (RPE 5-6 out of 10)
3-4
3 sessions per week
25-30 minutes
Solidifying patterns, building consistency
Moderate (RPE 6-7 out of 10)
5-6
3 sessions per week
30-35 minutes
Adding volume, increasing by 5 reps per exercise
Moderate-High (RPE 7 out of 10)
7-8
3 sessions per week
30-35 minutes
Tempo variations, longer hold times
Moderate-High (RPE 7-8 out of 10)
Between dedicated training blocks, throw in movement snacks—quick two-minute mobility sessions where you do one or two stretches. Schedule these during natural daily transitions: after waking up, before lunch, when you get home from work. They maintain the mobility gains you're creating during formal workouts.
Pay attention to what your body tells you. Muscle soreness that peaks twenty-four to forty-eight hours after training is normal and expected, especially at first. Sharp pain, pinching sensations, or discomfort that gets worse as you continue the exercise? Those are warning signs. Stop that movement and either reduce the range or swap in a different exercise targeting the same muscles.
Your posture improvement training won't follow a straight line upward. Some weeks you'll make fantastic progress. Other weeks you'll just maintain. Sometimes you'll feel like you're going backward. That's all normal. Your nervous system reorganizes in spurts and plateaus, not smooth curves. Trust the process and stay consistent.
Common Form Mistakes That Make Posture Worse
Author: Jessica Taylor;
Source: thelifelongadventures.com
Good intentions with bad execution can reinforce exactly the patterns you're trying to fix. Watch out for these compensation strategies that undermine your back strengthening exercises.
Arching your lower back during upper body exercises: When doing rows, pull-aparts, or face pulls, lots of people compensate for weak upper back muscles by hyperextending their lumbar spine and flaring their ribcage. It creates the illusion of better posture while actually increasing stress on your lower back. Keep your core engaged and ribs down throughout upper body work. If you can't maintain that position, reduce the resistance.
Leading with your chin during exercises: Chin-jutting becomes so habitual most people don't even know they're doing it. During planks, bird dogs, or any exercise done lying on your stomach, your head should stay in line with your spine. Imagine a straight pathway running from the top of your head down through your tailbone. Excessive chin tucking is equally problematic—neutral means neutral.
Shrugging shoulders toward ears: This shows up constantly in overhead movements and rowing variations. Your shoulders should stay down and back rather than creeping up toward your ears. If you can't do an exercise without shrugging, you're either using too much resistance or haven't developed the shoulder blade control needed for that movement yet.
Holding your breath: Breathing dysfunction goes hand-in-hand with postural dysfunction. Lots of people unconsciously hold their breath during challenging positions, which spikes blood pressure and prevents proper core engagement. Keep breathing continuously throughout every exercise. Exhale during the hard part (lifting, pulling, or resisting).
Forcing range of motion: Your current mobility is your current mobility. Forcing your arms flat against the wall during wall angels when your shoulders aren't ready accomplishes nothing except potential injury. Work within your available range and it will gradually expand. Pain-free movement always trumps hitting a specific position.
Overusing momentum: Posture correction exercises work through controlled muscle contraction, not momentum. If you're swinging, bouncing, or using body English to complete reps, you're training movement rather than strengthening the specific muscles that support good posture. Slow down. Control both the lifting and lowering phases.
Ignoring one side: Most people have asymmetries—one shoulder sits higher, one hip is tighter, one side is stronger. The temptation is to favor your better side. Don't. Your weaker side needs more attention, not less. Consider doing an extra set on your weaker side until the imbalance resolves.
Tracking Your Progress: Posture Assessment Checkpoints
Postural changes happen gradually. Without objective tracking, you might miss significant improvements or get discouraged by the pace.
Take reference photos every two weeks. Stand naturally against a plain wall in consistent lighting. Capture four angles: front, back, and both sides. Wear fitted clothing. Don't "pose" with corrected posture—just stand how you normally stand. These photos reveal changes you can't see day-to-day. After eight weeks, compare your latest photos to your originals. The difference is often dramatic.
Measure your wall test distance. Stand with your back to a wall, heels about six inches out. Try to touch your lower back, upper back, and head to the wall without straining. Measure the gap between the wall and the back of your head. Initially, many people have three to four inches of space—their head simply won't reach the wall without excessive effort. As posture improves, this distance shrinks. Test monthly.
Track your pain levels and locations. Use a simple 0-10 scale and note where you're experiencing discomfort: neck, upper back, lower back, shoulders, hips. Record this weekly. Many people notice pain reduction before visible postural changes show up. Your pain journal proves the work is paying off even when the mirror doesn't show major shifts yet.
Monitor your exercise performance. How many bird dogs could you do with perfect form in week one? How about week eight? Can you hold a plank longer? Has your band pull-apart resistance increased? Improvements in posture-specific exercises directly translate to better postural endurance in daily life.
Notice your awareness progression throughout the day. During your first weeks, you might catch yourself slouching and consciously correct it three times daily. By month two, that number often jumps to ten or fifteen—not because your posture got worse, but because your awareness sharpened. By month three, many people find they're maintaining better posture unconsciously for longer stretches. This progression from unconscious incompetence through conscious competence to unconscious competence takes time but represents real neurological rewiring.
Set realistic timelines. Noticeable improvements typically show up within four to six weeks of consistent work. Significant visible changes usually take three to four months. Complete postural remodeling—where good posture feels natural and effortless—takes six to twelve months for most people. These timelines assume consistent execution of both daily desk exercises and two to three dedicated training sessions weekly.
Celebrate small wins. Your head touches the wall during the wall test. You make it through an entire meeting without shoulder pain. You notice you're sitting upright without thinking about it. These victories matter more than dramatic before-and-after photos.
Frequently Asked Questions About Posture Correction
How long does it take to see results from posture correction exercises?
Most people notice reduced pain and increased awareness within three to four weeks of consistent work. Visible changes in how you stand and sit typically appear between six and eight weeks. Complete postural remodeling—where proper alignment feels natural and requires minimal conscious effort—usually takes four to six months. These timelines assume you're doing daily desk exercises plus two to three dedicated training sessions per week. Spotty practice extends these timeframes significantly. Your nervous system needs repetition to rewire ingrained patterns.
Can you fix years of bad posture with exercise alone?
Exercise addresses the muscular imbalances and movement pattern dysfunction that cause and perpetuate poor posture. For most people, that's enough to achieve substantial improvement. However, exercise works best when combined with environmental modifications (ergonomic workspace setup, proper pillow height, appropriate footwear) and lifestyle adjustments (regular movement breaks, reduced phone time, position variety throughout the day). Severe structural changes like advanced degenerative disc disease or significant scoliosis may require interventions beyond exercise. But even in these cases, targeted exercise remains a cornerstone of management.
Should I do posture exercises every day or give my muscles rest days?
Depends on the exercise type. Daily desk posture exercises—the five-minute routine of stretches and mobility work—should happen every day, weekends included. These movements don't create significant muscle damage requiring recovery. They're pattern interruption and mobility maintenance. Your dedicated back strengthening workout routine, however, does need rest between sessions. Schedule these two to three times per week with at least one day between sessions. Your muscles get stronger during recovery, not during the workout itself. Overtraining leads to fatigue, poor form, and potential injury.
What's the difference between stretching and strengthening for posture?
Stretching targets muscles that have become tight and shortened from prolonged positions—your hip flexors from sitting, chest muscles from forward arm positions, neck muscles from looking down at screens. Stretching creates space and restores length to these tissues. Strengthening hits muscles that have become weak and overstretched—your upper back, deep neck flexors, glutes, and core stabilizers. Strengthening builds the endurance these muscles need to hold you in proper alignment throughout your day. You need both. Stretching tight muscles without strengthening weak ones leaves you loose but unsupported. Strengthening weak muscles without stretching tight ones creates a tug-of-war where the tight muscles still win.
Do I need equipment or can I correct my posture with bodyweight exercises?
You can make substantial progress with bodyweight alone. Prone Y-raises, wall angels, bird dogs, dead bugs, glute bridges, and various stretches require nothing but floor space. That said, a simple resistance band (costs ten to fifteen bucks) significantly expands your options and allows for progressive overload. Band pull-aparts, face pulls, and banded rows rank among the most effective posture exercises, and they're impossible to replicate with bodyweight only. You don't need a gym membership, fancy equipment, or expensive gadgets. A single resistance band covers everything beyond bodyweight work.
Is it normal to feel sore when starting posture correction exercises?
Absolutely, muscle soreness is completely normal, especially during your first two to three weeks. You're asking muscles that have been dormant or underactive for years to suddenly do significant work. Expect soreness in your upper back between your shoulder blades, your glutes, and possibly your deep core. This delayed onset muscle soreness typically peaks twenty-four to forty-eight hours post-workout and gradually subsides. It should feel like general muscle achiness, not sharp or pinching pain. Sharp pain, burning, numbness, or tingling means stop that exercise and consult a healthcare provider. Normal soreness shouldn't prevent you from doing daily activities, though you might move a bit stiffly. If soreness is severe, reduce your training volume or intensity for your next session.
Your posture reflects the cumulative effect of thousands of daily positions and movements. Reversing years of dysfunction takes patience, consistency, and realistic expectations. But the payoff compounds—less pain, better breathing, improved athletic performance, increased confidence, and protection against future injury.
Start with the five-minute daily desk routine. Get these movements wired in until they become automatic. Add the full back strengthening workout twice weekly. Follow the progressive schedule, advancing only when you can execute all exercises with clean form. Document progress through photos, measurements, and performance metrics.
Remember that perfect posture doesn't exist as a fixed state. Your goal isn't maintaining military rigidity for sixteen waking hours. You're building the strength and mobility to move easily between positions, to recognize when you've drifted into dysfunction, and to self-correct without conscious strain.
Some days you'll forget your desk exercises. Some weeks you'll miss a workout. That doesn't erase progress. Consistency across months matters more than perfection during any individual week. Each time you return to these practices, you're reinforcing neural pathways that make proper posture increasingly automatic.
Your body adapted to create your current posture. It'll adapt again to support better alignment. Give it the stimulus it needs through targeted exercise, the time it requires for genuine change, and the consistency that transforms temporary improvements into permanent adaptations.
Every person confidently loading plates once stood exactly where you are — confused and uncertain. This guide bridges that gap with seven fundamental lifting techniques, a complete 8-week plan progressing from foundation to overload, essential gear vs. marketing waste, how to pick starting weights, five mistakes that destroy beginner progress, and tracking methods that reveal real gains the scale
Research shows eight weeks of band training produces strength gains statistically identical to free weights — yet bands cost $30-50 total with zero commute. This guide covers how variable resistance builds muscle, a band selection table by type and tension, 12 essential exercises with form cues, three structured plans for beginners through fat loss, progression tactics without traditional weights,
Your PRs stalled, sleep feels useless, and you're snapping at coworkers — these aren't character flaws, they're overtraining red flags. This guide covers 12 physical and mental warning signs from elevated resting heart rate to hormonal disruption, who's most at risk, a science-backed recovery protocol for the first critical weeks, training load monitoring tools including HRV tracking, and the prev
Most morning workout plans die within three weeks — not from lack of willpower but from friction points nobody addresses. This guide covers five mistakes that sabotage routines before they start, a 15-minute zero-equipment circuit framework, a step-by-step first-week program, night-before preparation systems that eliminate decision fatigue, and why 66 days — not 21 — is the real habit formation ti
The content on this website is provided for general informational and educational purposes related to health, yoga, fitness, and overall wellness. It is not intended to replace professional medical advice, diagnosis, or treatment.
All information, workout suggestions, yoga practices, nutrition tips, and wellness guidance shared on this site are for general reference only. Individual health conditions, fitness levels, and medical needs vary, and results may differ from person to person. Always consult a qualified healthcare provider before starting any new exercise program, dietary plan, or wellness routine.
We are not responsible for any errors or omissions, or for any outcomes resulting from the use of information presented on this website. Your health and fitness decisions should always be made in consultation with appropriate medical and fitness professionals.