You've been practicing yoga for a couple years now. Your Downward Dog feels solid, your Warrior sequences flow smoothly, and you're eyeing those impressive poses you see on Instagram—the ones where people seem to defy gravity or fold impossibly in half. Here's what nobody tells you: getting there takes most people 3-5 years of dedicated practice, and even then, some poses might never happen because of how your bones are shaped.
Advanced postures aren't just harder versions of what you're already doing. They're entirely different animals that demand strength reserves you haven't built yet, flexibility in muscles you didn't know existed, and the kind of body awareness that only comes from thousands of hours on your mat.
What Makes a Yoga Pose "Advanced"?
The difference isn't subjective. You can measure it.
Your muscles need to generate force in completely new ways. Supporting your full bodyweight on your hands in something like Handstand or Eight-Angle Pose activates muscle fibers that never fire during your regular vinyasa class. Your shoulders have to stabilize under serious load while your core prevents everything from collapsing—a coordination puzzle that doesn't solve itself in a few weeks.
The flexibility piece goes way past basic stretching. Take a deep backbend like Wheel Pose where you lift one leg off the ground. You're opening through your hip flexors, quads, chest, and shoulders all at once, while simultaneously staying strong through your entire back side. This is active flexibility—controlling your range of motion while under tension—which is a totally different game than touching your toes when you're relaxed.
Balance gets exponentially harder when your support base shrinks or shifts away from your body's center. Try balancing on your forearms in Peacock Pose—it requires spatial awareness that develops slowly through repeated exposure to unstable positions. Your inner ear's vestibular system literally needs training time to adapt.
Your breathing can't fall apart. Lose your steady breath in a pose? You're not ready for it yet. These postures compress or expand your torso in ways that make breathing mechanically challenging. When your breath goes ragged, your nervous system is basically screaming "this is dangerous," which dramatically increases your injury risk.
The consequences of mistakes multiply. A slight alignment issue in Warrior II might give you a bit of soreness. That same small error in Forearm Scorpion can tear your rotator cuff or strain your neck badly enough to need months of physical therapy. The margin for error shrinks as complexity increases.
Prerequisites Before Attempting Difficult Yoga Poses
Jumping straight to advanced work without building your base guarantees you'll either get hurt or stay frustrated for years.
Here's what you should nail first: Hold Chaturanga with perfect form for 30 seconds. Stay in Crow Pose without wobbling for a full minute. Balance in Headstand away from any wall support for three minutes. Sit in Pigeon Pose with squared hips for five minutes per side. Press up into Wheel Pose with straight arms and hold for ten breaths. If any of these make you struggle or seem impossible, you've got foundation work to do.
Test yourself objectively. Try holding a hollow body position for 60 seconds—can you do it without your lower back arching off the floor? That's minimum core strength for inversion work. Get into Bridge pose and walk your hands toward your feet. If you can't, you lack the baseline shoulder flexibility for serious backbends. Close your eyes and balance on one foot—can you last 30 seconds without wobbling? That's your proprioception baseline for arm balance practice.
The body is your temple. Keep it pure and clean for the soul to reside in.
— B.K.S. Iyengar
You'll know you're ready when poses feel stable instead of shaky, when breathing stays smooth throughout the hold, when you bounce back quickly between attempts, and when you can pinpoint exactly which muscles are doing the work. If your description is vague like "my back hurts somewhere," you don't have enough body awareness yet for this level of practice.
Core Strength Benchmarks
Author: Logan Brooks;
Source: thelifelongadventures.com
Real core strength isn't about visible abs. It's about your deep stabilizers—transverse abdominis, multifidus, pelvic floor muscles—firing automatically to protect your spine when you're under load.
Try this test: Lie on your back and slowly lower both straight legs from 90 degrees to hovering just above the floor. Does your lower back arch away from the ground? Then you don't have the anterior core strength needed for poses like Flying Pigeon. How about Side Plank with your top leg lifted—can you hold that for 45 seconds per side? That lateral stability is what keeps you from collapsing in Side Crow.
The dead bug exercise exposes coordination gaps fast. On your back, extend opposite arm and leg while keeping your spine completely neutral. Can't do 20 controlled reps per side? Your brain hasn't wired the cross-body movement patterns that arm balances require.
Compression strength—pulling your knees forcefully toward your chest—determines whether you can lift into poses like Lolasana (Pendant Pose). Sit on the floor with hands beside your hips and try lifting your hips and feet. Nothing happens? You need several months of core conditioning before you can attempt jump-throughs or those floating transitions.
Flexibility Milestones to Reach First
Author: Logan Brooks;
Source: thelifelongadventures.com
Flexibility minus strength equals instability. Strength minus flexibility restricts movement. You need both for advanced work.
For deep backbends, your shoulders need passive flexion reaching at least 180 degrees. Test it: Lie face-down and have someone gently lift your arm straight overhead. If your shoulder comes off the floor before your arm reaches vertical, shoulder tightness will limit your backbending no matter how flexible your spine is.
Hip flexor length determines backbend safety. Do a Thomas test: Lie at a table's edge with one knee pulled to your chest. Does your hanging leg's thigh lift above horizontal? Tight hip flexors will force excessive extension into your lower back during Wheel or Kapotasana, creating compression injuries.
Hamstring flexibility requirements vary by pose, but in a seated forward fold, your chest should reach your thighs while maintaining a neutral spine. This indicates sufficient length for most advanced hip openers. The critical part is spinal integrity—rounding your back to grab your toes doesn't count as real flexibility.
External hip rotation capacity determines if poses like Lotus or Eka Pada Sirsasana (Foot Behind Head) are even anatomically possible for your skeleton. Some hip sockets simply won't allow extreme rotation regardless of how much you stretch. Forcing these shapes tears the labrum.
Author: Logan Brooks;
Source: thelifelongadventures.com
12 Advanced Yoga Poses Broken Down by Skill Type
Each pose emphasizes specific skills. Understanding these emphases helps you design targeted prep routines.
Pose Name
Difficulty Level (1-5)
Primary Skill Required
Prep Time Needed
Injury Risk Areas
Handstand (Adho Mukha Vrksasana)
4
Upper body strength + balance
6-12 months
Wrists, shoulders
Forearm Stand (Pincha Mayurasana)
5
Shoulder flexibility + core
12-18 months
Shoulders, neck
Eight-Angle Pose (Astavakrasana)
4
Arm strength + hip flexibility
8-14 months
Wrists, shoulders
Flying Pigeon (Eka Pada Galavasana)
4
Hip opening + balance
10-16 months
Knees, wrists
Wheel Pose (Urdhva Dhanurasana)
3
Backbend flexibility + strength
4-8 months
Lower back, wrists
King Pigeon (Eka Pada Rajakapotasana)
5
Extreme backbend + hip opening
18-36 months
Lower back, knees
Scorpion (Vrschikasana)
5
Backbend + inversion + balance
24-36 months
Shoulders, neck, lower back
Headstand Lotus (Urdhva Padmasana)
4
Inversion + hip flexibility
12-18 months
Neck, knees
Firefly (Tittibhasana)
4
Hamstring flexibility + arm strength
8-12 months
Hamstrings, wrists
Peacock (Mayurasana)
5
Arm balance + core compression
10-16 months
Wrists, elbows
Lotus Shoulder Stand (Padmasana Sarvangasana)
4
Inversion + hip flexibility
12-18 months
Neck, knees
Formidable Face Pose (Ganda Bherundasana)
5
Extreme backbend + balance
24-48 months
Neck, shoulders, lower back
Arm Balance Poses
Arm balances flip your world upside down, turning your hands into feet. The full-body integration feels completely unnatural at first.
Handstand looks straightforward but humbles nearly everyone who tries it. The mistake people make? Kicking up with bent arms, which guarantees you'll collapse. Start instead in Downward Dog with fingers spread wide, then walk your feet in until your shoulders stack directly over your wrists. That shoulder position—that's what you need to hold when you're inverted. Practice hopping up with one leg, focusing all your attention on pushing the floor away to maintain straight arms. Your core has to stay hollow to prevent arching. Most practitioners drastically underestimate the shoulder strength requirement—if holding Plank with perfect alignment for two minutes isn't easy, you're not ready.
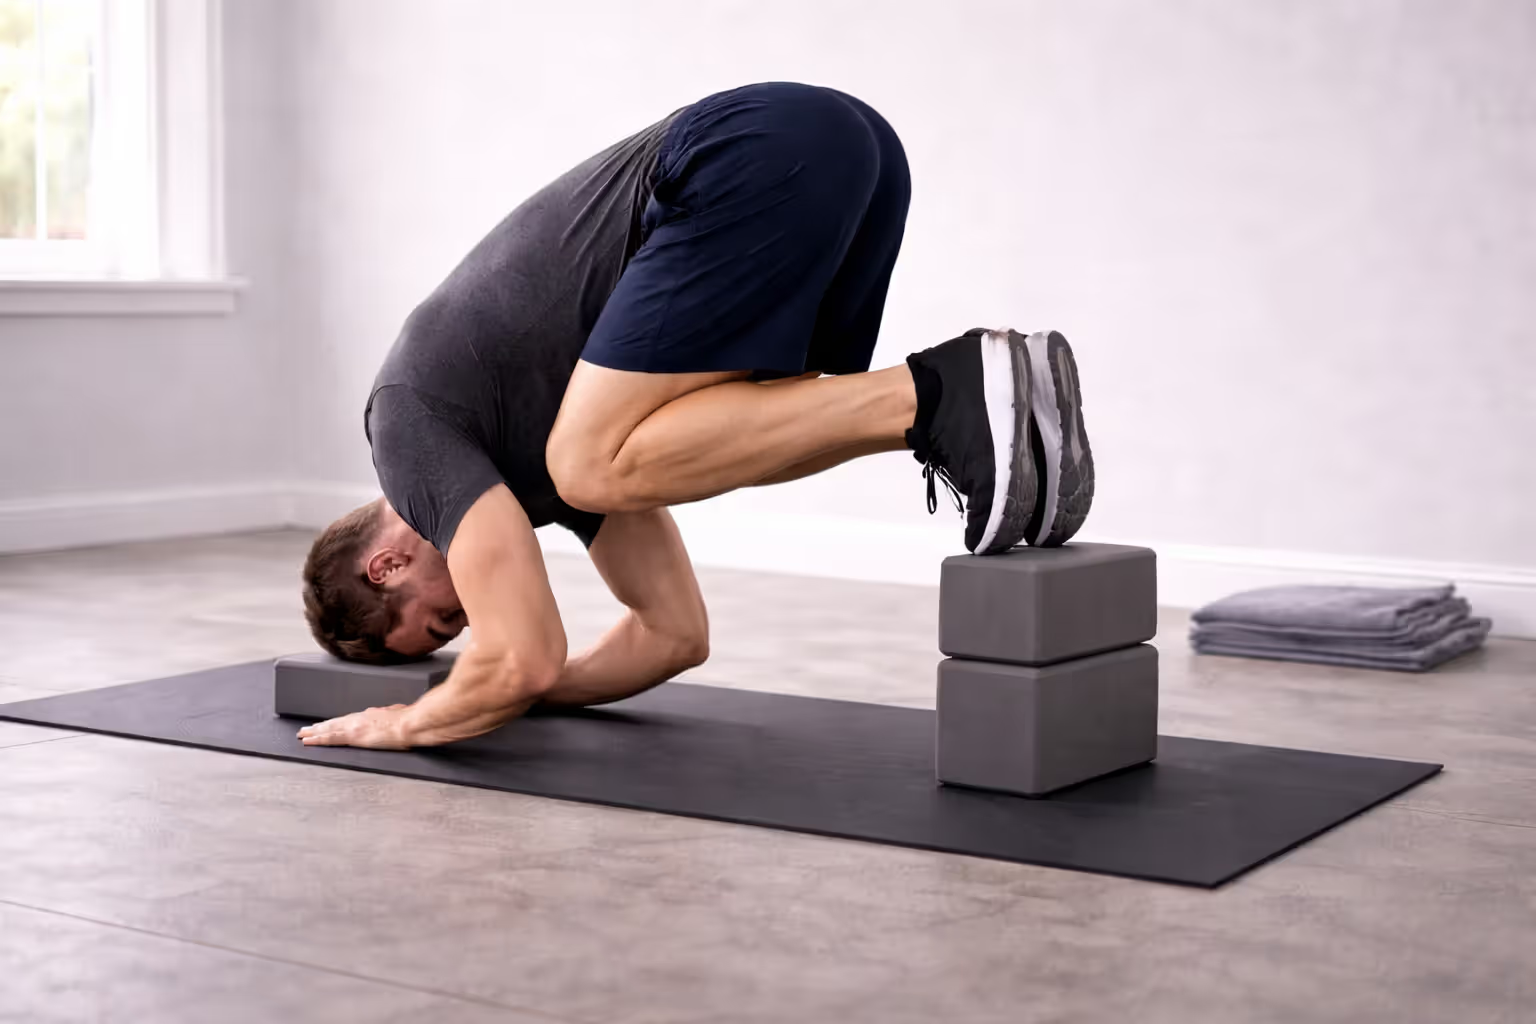
Eight-Angle Pose looks like human origami but breaks down into logical steps. From sitting, hook your right arm under your right knee, then plant both hands flat beside your hips. Lean forward and lift your hips while crossing your ankles. The tricky part? Maintaining the hip flexion that keeps your legs hooked while generating enough lift to straighten your arms. Most people try this before they can hold Lolasana, completely skipping the compression strength prerequisite.
Flying Pigeon demands hip opening that typically takes years to develop without injury. Start in a low lunge with your front shin parallel to your mat's front edge—real Pigeon preparation. If your hip doesn't open enough to square your pelvis here, the flying version will torque your knee dangerously. Once you've got sufficient hip flexibility, practice the balance by placing your shin on a hip-height block and leaning forward until your shoulders stack over your wrists. Only after you're stable there should you attempt the full expression.
Deep Backbend Poses
Author: Logan Brooks;
Source: thelifelongadventures.com
Backbends expose every mobility restriction and strength imbalance faster than any other pose category.
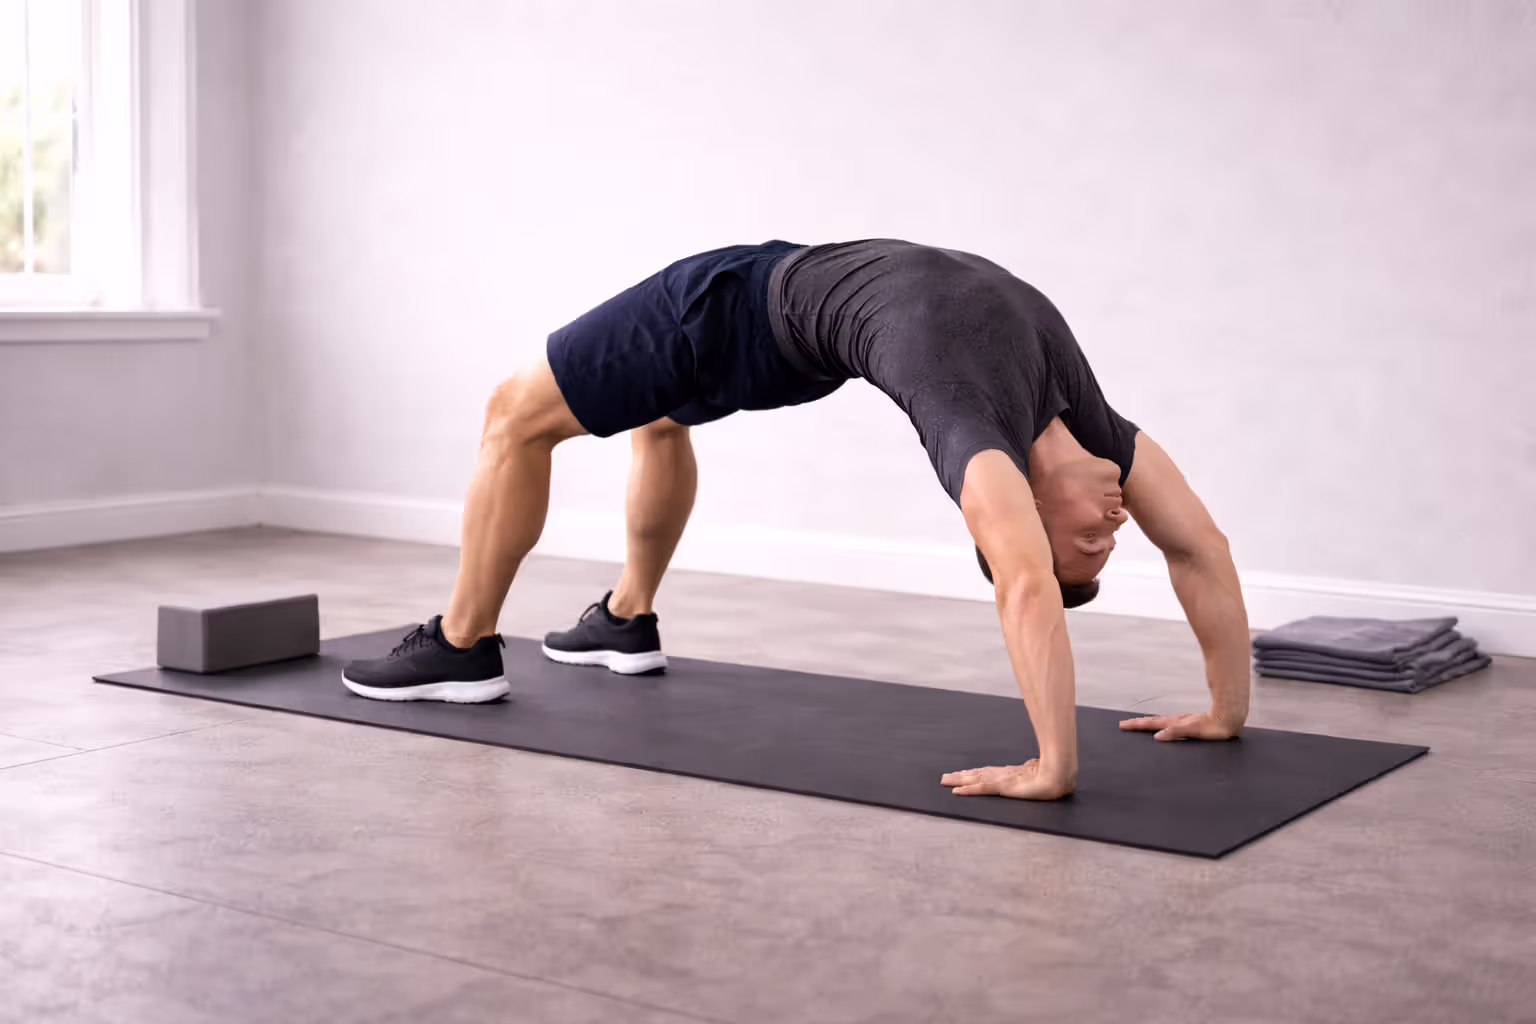
Your gateway to advanced backbending is Wheel Pose. The difference between struggling in Wheel and feeling strong? Where the curve originates in your spine. Most of the arch should come from your thoracic spine (mid-back), not your lumbar spine (lower back). Before pushing up, engage your glutes hard to posteriorly tilt your pelvis—this single action protects your lower back. Press firmly into your feet to straighten your legs, which deepens the hip flexor stretch and reduces lumbar compression. Heels lifting off the floor or knees splaying wide? You're compensating for tight hip flexors or weak glutes.
King Pigeon sits at the extreme end of backbending combined with hip opening. One leg folds in Pigeon while you arch backward to catch your foot overhead. The injury potential here is massive. Your front knee is vulnerable because the hip rotation is maximal, and your lower back gets compressed because most bodies lack the thoracic extension to achieve the arch safely. Spend at least a year in regular Pigeon and Wheel variations before even thinking about this. Even then, many skeletal structures simply aren't built for it.
Scorpion inverts you on your forearms while arching your legs overhead. The shoulder flexibility requirement is extreme—you need 180 degrees of flexion just to get into the forearm stand, then additional extension to arch backward. Most attempts fail because practitioners haven't logged enough time in Forearm Stand building the shoulder endurance needed to hold the position while adding backbend complexity. Get comfortable in Forearm Stand for five full minutes before layering in the backbend element.
Inversion Poses
Inversions reverse gravity's pull on your body, requiring trust and spatial awareness that builds gradually.
Forearm Stand demands more shoulder flexibility than Handstand because your arms are bent at 90 degrees. Try clasping your hands behind your back and lifting them away from your body—if you can't, your shoulders are too tight for this pose. The error everyone makes is letting their ribs flare forward, which collapses everything. Instead, pull your front ribs toward your spine while pushing your forearms hard into the floor. Keep your head neutral, not dropped backward. Many people kick up repeatedly without success because they haven't developed the shoulder strength to hold the position—start with wall-supported holds first, building up to 60 seconds.
Headstand Lotus combines two challenging elements. First, you need stable, sustainable Headstand where your forearms and hands create a tripod of support and your core maintains a straight line. Second, you need safe Lotus hip mobility. Attempting Lotus while upside down before you can sit in it comfortably for ten minutes risks knee injury because you can't feel the subtle warning signs of strain when you're inverted. The weight distribution in inverted Lotus also shifts in unexpected ways, requiring core adjustments that catch most people off guard.
Lotus Shoulder Stand places significant load on your cervical spine while your hips are in extreme flexion and external rotation. The prerequisite is solid Shoulder Stand where your weight rests on your shoulders and upper arms, absolutely not on your neck. Feel any neck pressure at all? You're not ready. The Lotus component adds hip complexity, but the real danger is cervical strain from improper weight distribution.
Advanced Hip Opener Poses
Hip opening reveals the harsh reality of skeletal variation—some poses simply aren't accessible to all bodies, period.
Firefly requires hamstring flexibility to straighten your legs while they're draped over your arms, plus arm strength to hold yourself suspended. The setup is everything: squat deeply, thread your arms under your knees, and walk your hands back until they're behind your feet. Then lean back, straighten your legs, and lift your feet off the ground. Most people try lifting before their hands are positioned far enough back, which makes the balance physically impossible. If your hamstrings are tight, your legs will stay bent regardless of how hard you try.
Peacock will humble you quickly. Your hands point backward, elbows dig into your abdomen, and you balance your entire body parallel to the floor. The elbow placement creates a fulcrum that requires tremendous core compression and shoulder strength. Start by practicing the hand position and elbow placement while kneeling, then lean forward to feel where the balance point is. Your head will end up quite low. Many people lack the wrist extension to even position their hands correctly.
Here's the hard truth: bone structure determines your ceiling in hip-opening poses. If your femur meets your hip socket at an angle limiting external rotation, no amount of stretching will achieve Lotus. Forcing it damages cartilage permanently. Honest assessment of your skeletal limits prevents years of frustration and potential serious injury.
Author: Logan Brooks;
Source: thelifelongadventures.com
Step-by-Step Progression Plan for Advanced Yoga Training
Safe progression requires structured timelines and specific preparatory work for each target pose.
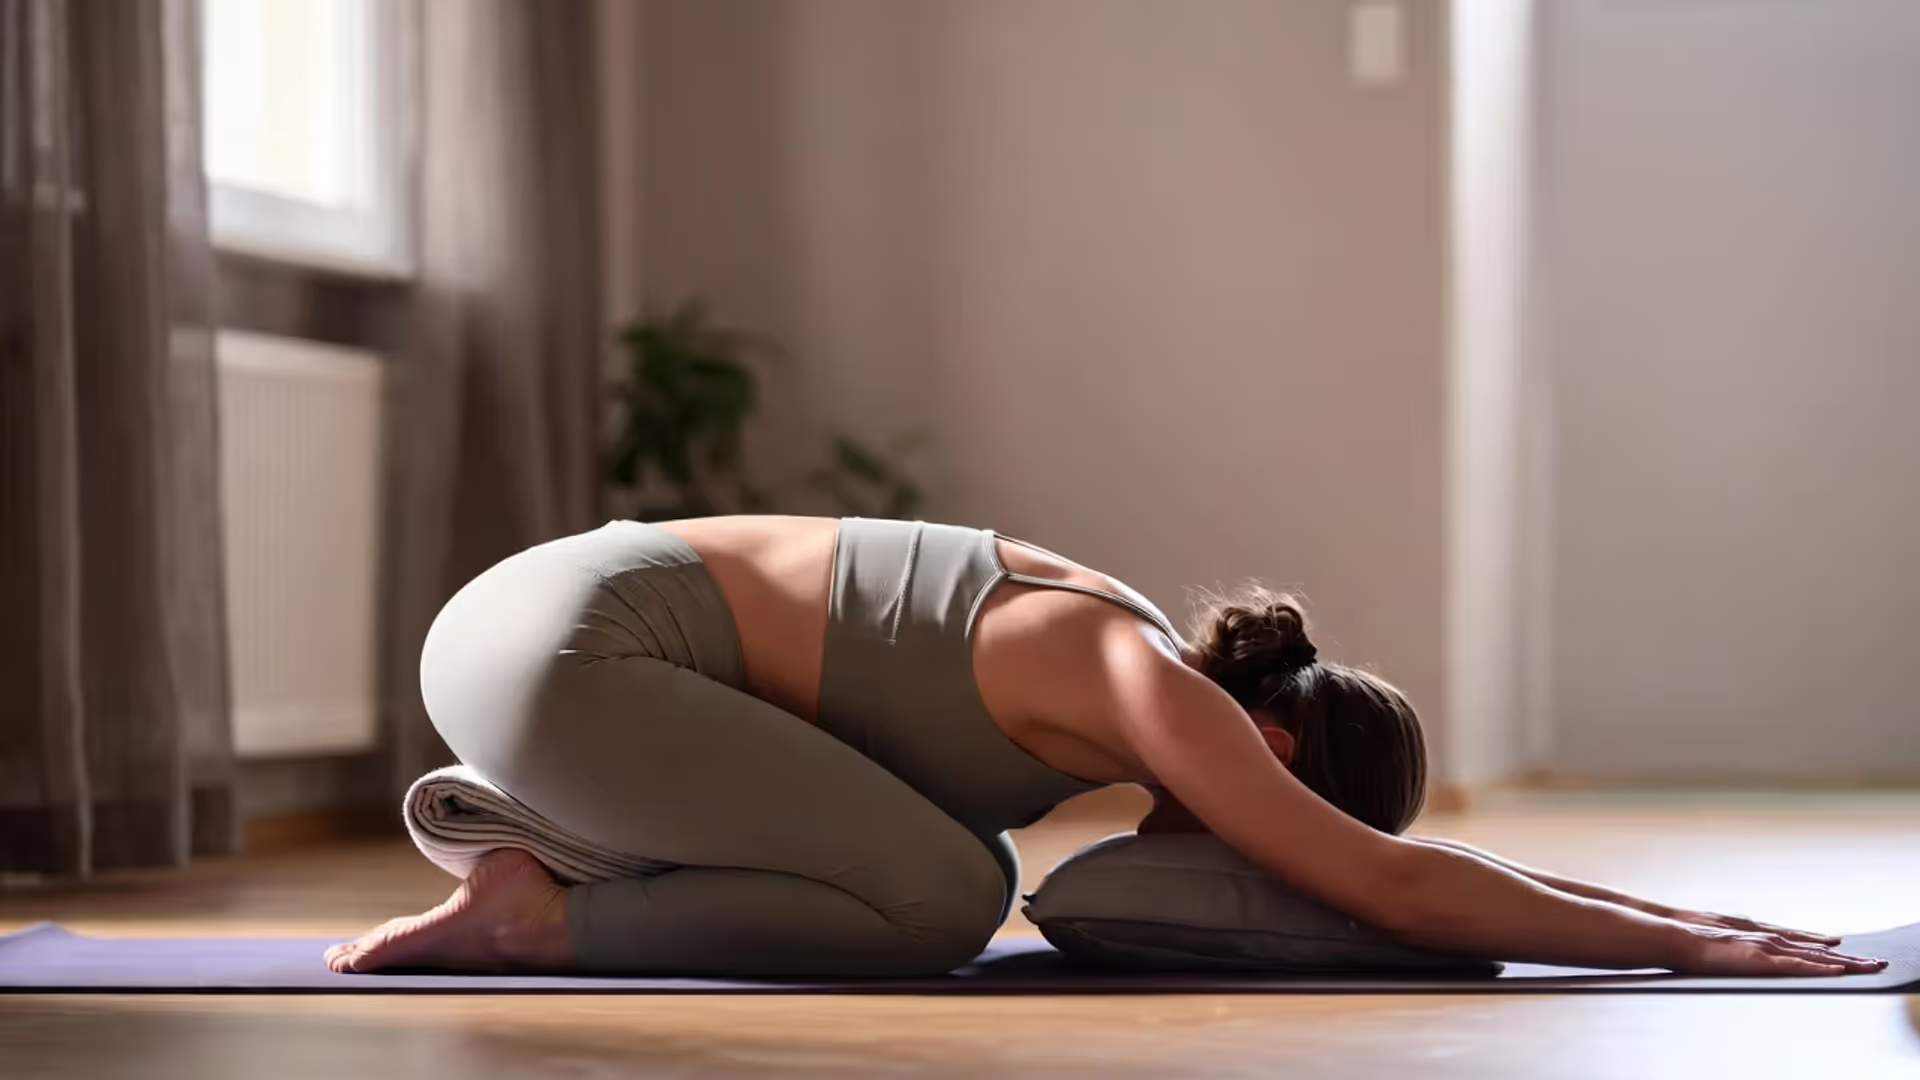
Months 1-3: Foundation reinforcement. Even if you've been practicing for years, dedicate this period to perfecting your Chaturanga, building your Crow Pose hold to 90 seconds, and establishing daily Headstand practice away from the wall. Add specific strength work: hollow body holds, plank variations, and glute bridges. Your flexibility work should focus on passive stretching in low-stress positions—long-held Pigeon, supported backbends over bolsters, and wall-assisted hamstring stretches.
Months 4-6: Skill-specific preparation. Pick one advanced pose as your primary goal. Targeting Handstand? Practice wall walks (climb your feet up a wall from Downward Dog) and shoulder taps in Plank. Aiming for Wheel? Add Camel Pose and Bridge variations with blocks under your sacrum. Working toward arm balances like Flying Pigeon? Focus on one-legged balance sequences and hip-opening flows. The key is daily exposure to preparatory positions—ten focused minutes beats an unfocused hour-long practice.
Months 7-12: Progressive loading. Start attempting your target pose with full support. For inversions, use a wall. For arm balances, use blocks under your feet or head to reduce the load. Film yourself to check alignment—your perception while inverted or balanced is notoriously unreliable. Gradually reduce support as strength and confidence build. Expect to fail repeatedly. Each attempt teaches your nervous system what it needs to know.
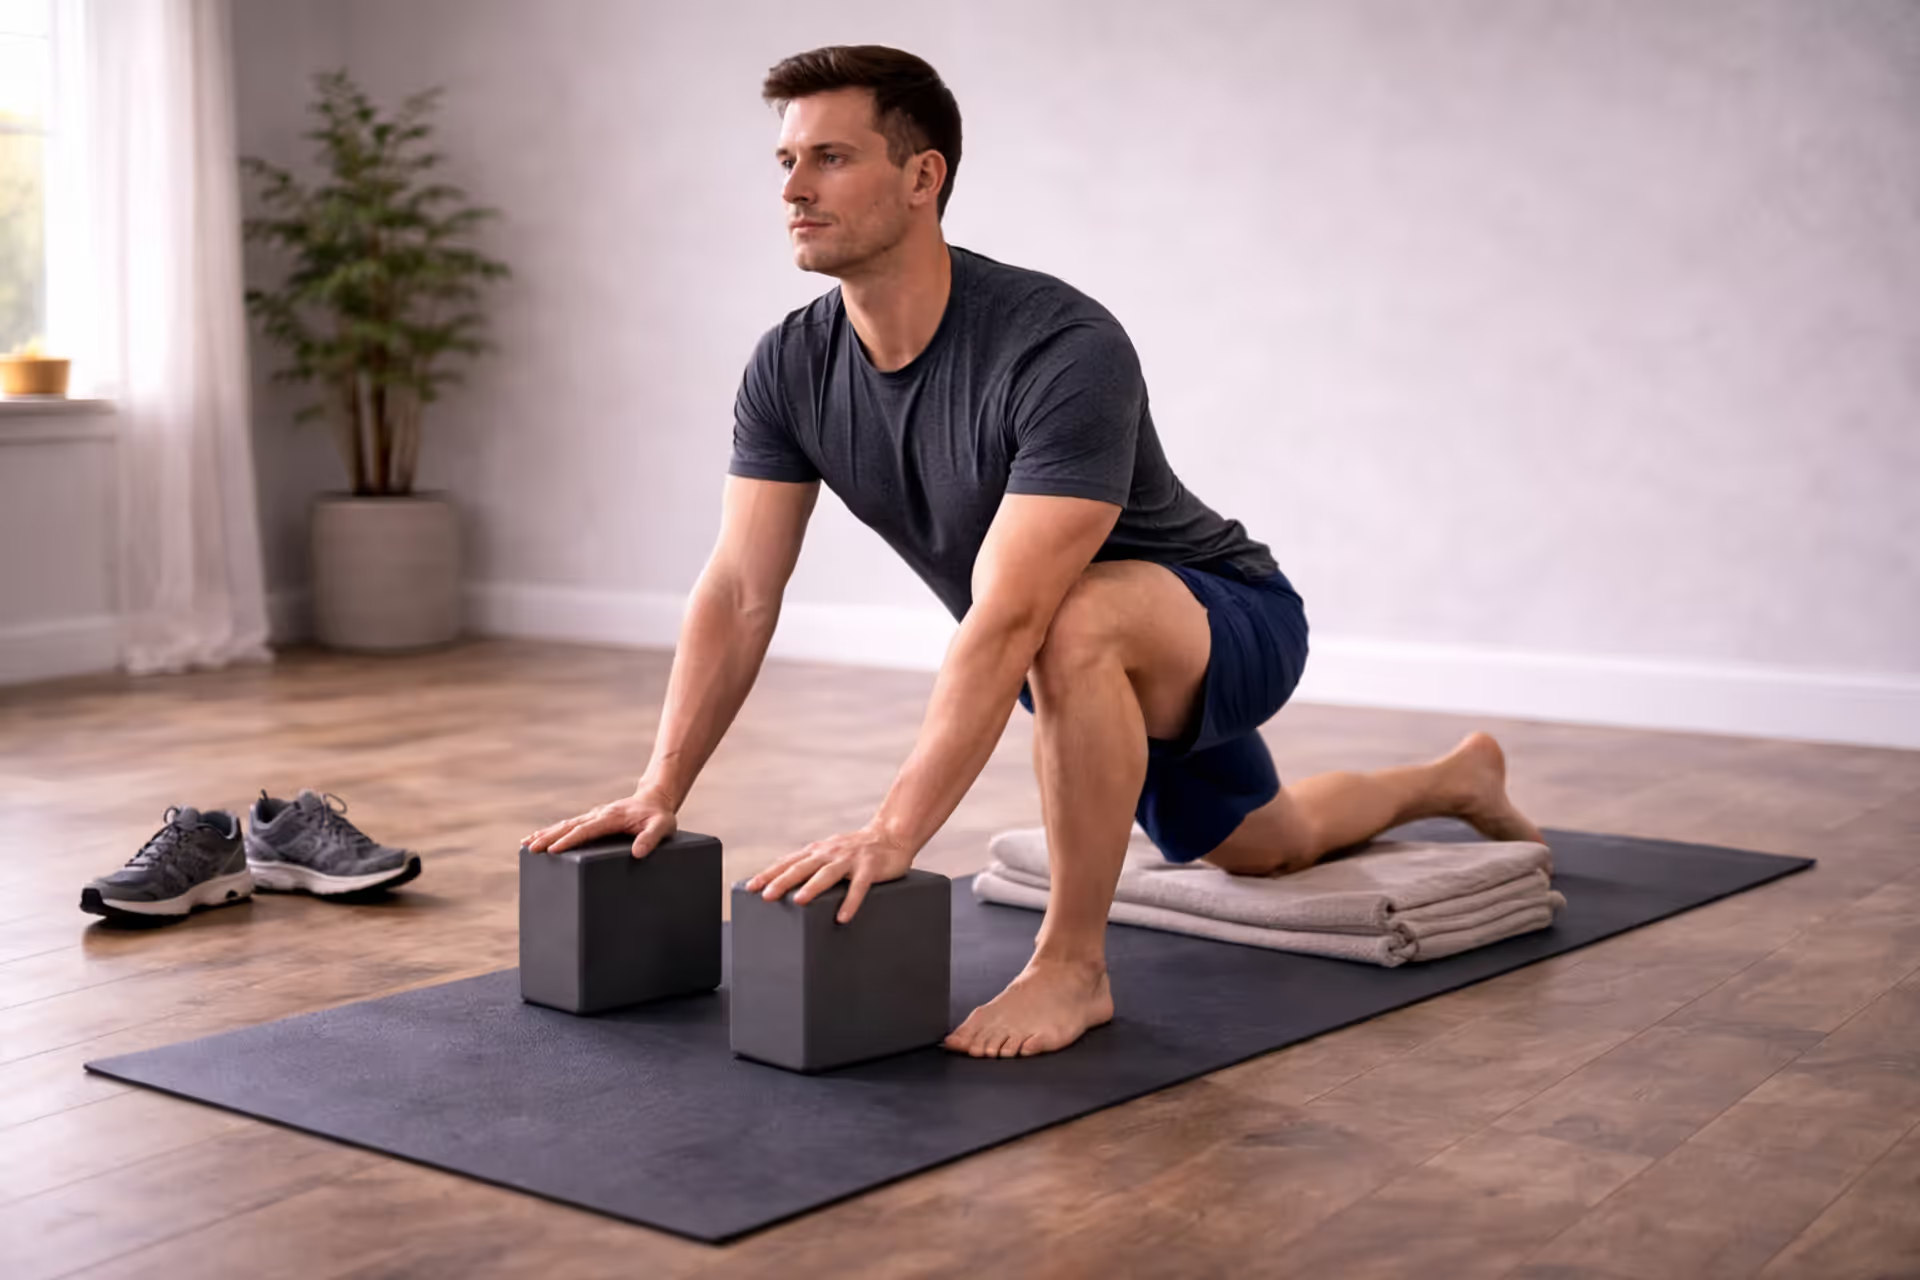
Modification strategies accelerate progress when you apply them intelligently. For backbends, place blocks under your hands in Wheel to reduce the range of motion required. For arm balances, rest your forehead on a block to reduce the strength demand while you build endurance. For hip openers, use straps to extend your reach until flexibility develops. Props aren't cheating—they're intelligent tools that allow you to experience the shape before you have full capacity.
The transition period between intermediate and advanced practice spans years, not months. Quick promises? That's just marketing. Your connective tissue remodels slowly. Your nervous system needs substantial time to wire new movement patterns. Patience isn't optional—it's the entire practice.
Most Common Injuries in Advanced Practice and How to Avoid Them
Advanced poses injure practitioners who skip steps or ignore their body's warning signals. Understanding the mechanisms keeps you off the injury list.
Wrist strain tops the injury charts because arm balances and inversions load your wrists in ways your daily life never prepares them for. The carpals (wrist bones) compress, the tendons of your finger flexors strain, and ligaments stretch. Prevention starts with proper weight distribution—your fingers should press actively into the floor, not just your palms. Your middle finger points straight forward, and you should feel pressure through your fingertips and the base of your index finger. All the pressure concentrating in your outer palm? You're collapsing. Wrist-strengthening exercises matter: practice pushing the floor away in Downward Dog, do wrist circles daily, and gradually increase your weight-bearing time. Sharp pain or numbness means stop right now. Some dull aching that goes away quickly is normal; persistent pain means you've damaged tissue.
Shoulder impingement happens when the space between your acromion (the bony point of your shoulder) and your rotator cuff tendons narrows, pinching the tissue. This shows up in poses like Forearm Stand when you let your shoulders collapse toward your ears instead of actively pushing away from the floor. Warning signs include pain at the front of your shoulder, especially when reaching overhead, plus clicking or catching sensations. Prevention requires building rotator cuff strength through exercises like external rotations with resistance bands and maintaining active shoulder depression (pulling your shoulders away from your ears) in all weight-bearing poses. Develop impingement? Back off overhead work completely until it resolves—pushing through makes it worse and can lead to tears.
Lower back compression results from backbending without proper technique. Your lumbar spine has natural extension capacity, but advanced backbends require thoracic extension (mid-back arching) that many bodies lack. When your mid-back won't extend enough, your lower back compensates by hyperextending, compressing the posterior elements of your vertebrae and potentially damaging discs. You'll feel a pinching sensation in your lower back during or after backbends. Prevention means strengthening your back extensors through exercises like Locust Pose variations while actively working on thoracic mobility through foam rolling and supported backbends over bolsters. Always engage your glutes to posteriorly tilt your pelvis before entering backbends—this creates space in your lumbar spine.
Hamstring tears happen when practitioners force forward folds or splits before their hamstrings have lengthened sufficiently. The injury typically occurs at the ischial tuberosity (sit bone) where the hamstring tendons attach. You'll feel a sharp, tearing sensation followed by bruising and weakness. Prevention requires respecting the difference between stretching discomfort and actual pain. Stretching should feel like pulling, never tearing. Always warm up thoroughly before deep stretching, and never bounce in stretches. Feel sharp pain in your sit bone area, especially during forward folds or leg lifts? You may have tendinopathy—continuing to stretch makes it worse. Hamstrings need strength work too; weak hamstrings are more injury-prone.
Building a Safe Home Practice for Challenging Yoga Poses
Practicing advanced poses alone requires more preparation than just showing up to a class.
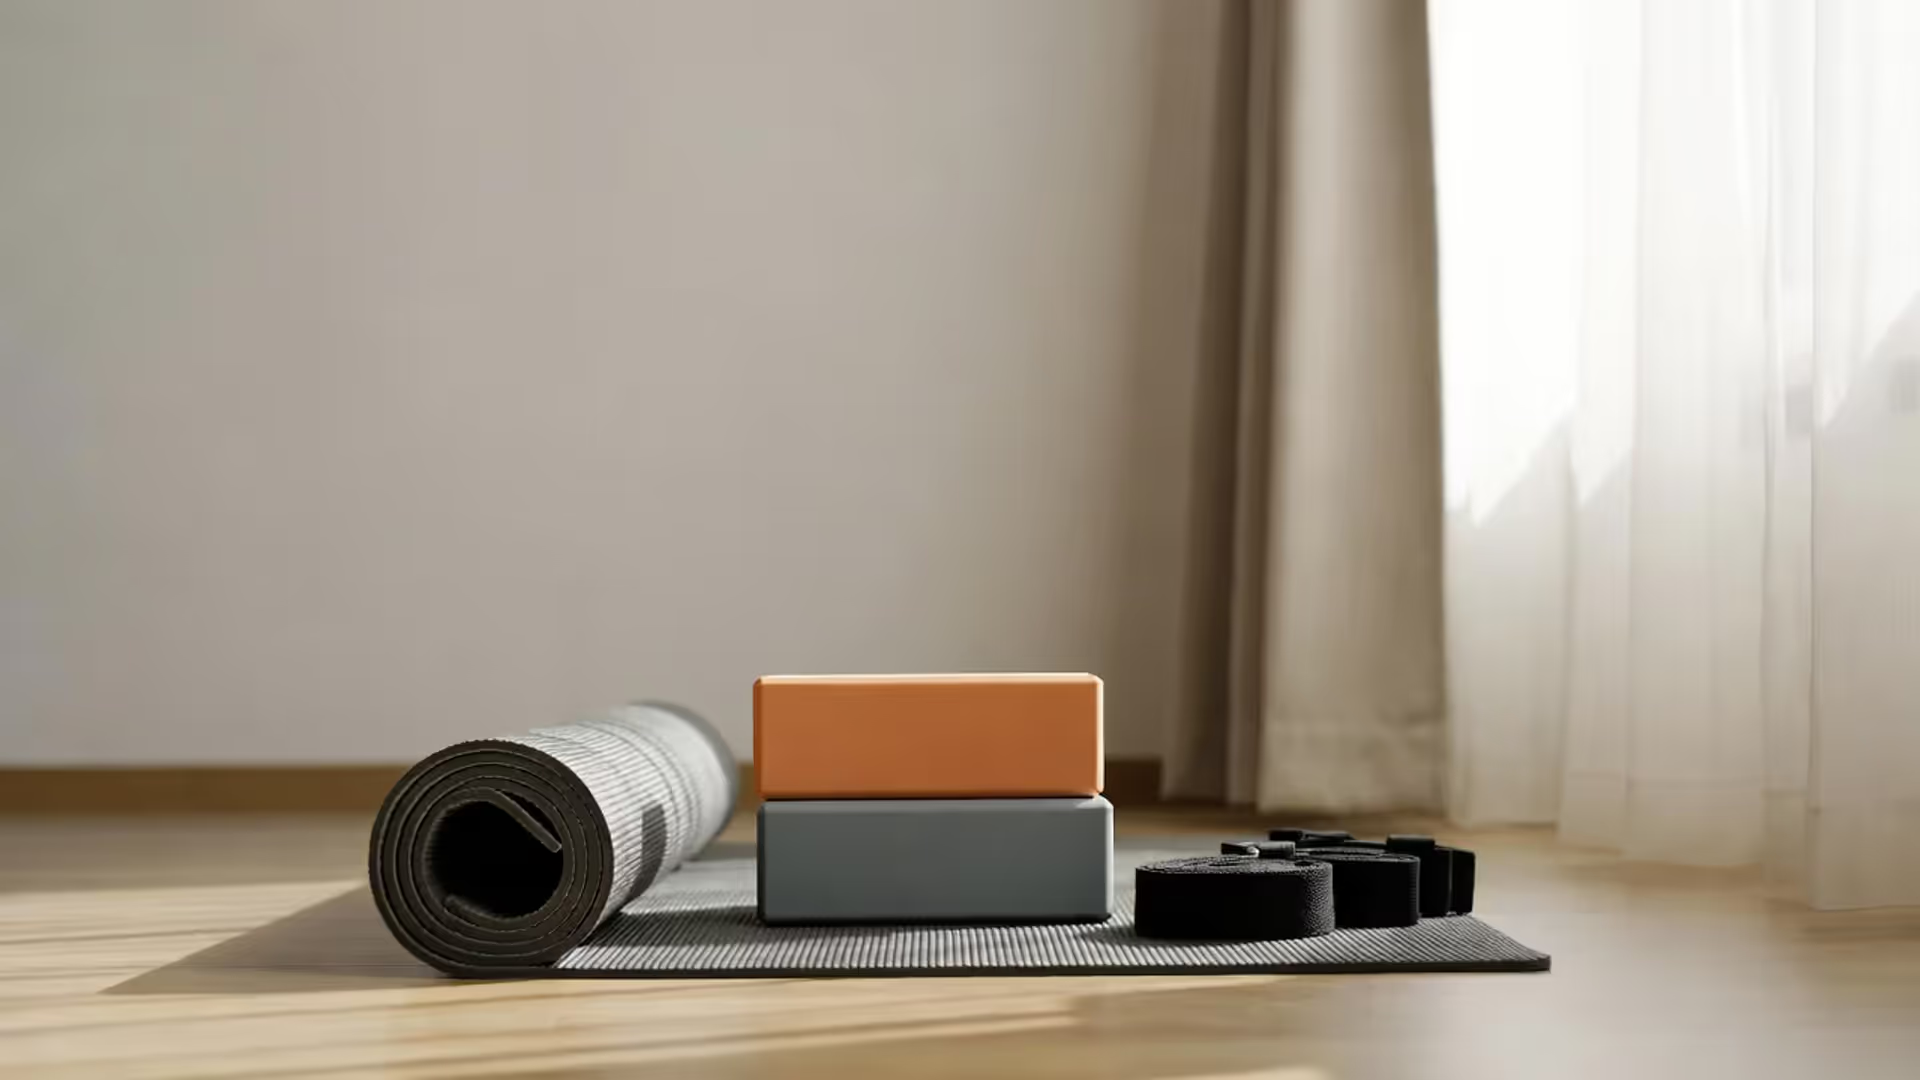
You'll need more than a mat. A wall provides essential support for inversion practice—you need clear wall space at least eight feet wide. Blocks (at least two, ideally four) allow modifications at various heights. A strap extends your reach in deep stretches. A bolster supports restorative positions between attempts. A yoga wheel helps build backbending capacity gradually. For serious arm balance work, consider crash pads—the foam blocks gymnasts use—which let you practice bailing safely. A full-length mirror gives you immediate visual feedback, though you can become overly dependent on it if you're not careful.
When to work with a teacher versus solo practice isn't always clear. For your first attempts at any advanced pose, in-person instruction is absolutely necessary. A teacher spots you, adjusts your alignment, and catches errors you can't feel. Once you understand the basic mechanics and can achieve the pose with assistance, home practice reinforces the pattern. However, if you're not progressing after several weeks of solo work, you've probably developed a habit that needs correction. Regular check-ins with a qualified teacher—even just monthly sessions—prevent the accumulation of misalignments that lead to injury or frustrating plateaus.
Recording yourself reveals the massive gap between how a pose feels and what you're actually doing. Set your phone to record from the side and behind, then watch with a critical eye. Are your arms as straight as you thought? Is your back flat where you thought it was arching? Compare your video to demonstrations from reputable teachers. The discrepancy is often humbling but incredibly valuable. Review your videos weekly to track progress and catch developing bad habits early.
Your warm-up sequences for advanced practice need to differ substantially from general class warm-ups. You're preparing specific tissues for extreme demands. For arm balances, spend 15 minutes on wrist mobility, shoulder activation, and core engagement. For backbends, warm your hip flexors, strengthen your glutes, and mobilize your thoracic spine. For inversions, activate your shoulders, warm your core, and practice balance drills. A proper warm-up takes 20-30 minutes minimum. Rushing into advanced poses cold guarantees poor performance and jacks up your injury risk.
The reality? Home practice without adequate knowledge is dangerous. If you can't explain exactly which muscles should be working in a pose and why, you're not ready to practice it unsupervised.
FAQ
How long does it take to master advanced yoga poses?
Most advanced poses require 12-36 months of consistent, focused practice after you've established a solid intermediate foundation. "Mastery" means holding the pose with proper alignment for several breaths, entering and exiting with control, and practicing it safely without supervision. Handstand typically takes 12-18 months for most practitioners starting from intermediate level. Scorpion or King Pigeon might take 3-5 years. Your starting point, body proportions, age, injury history, and practice frequency all affect the timeline. Practicing six days a week progresses faster than twice weekly. That said, frequency isn't everything—your tissues need recovery time between sessions. The practitioners who progress fastest practice intelligently, not just frequently.
Can I learn advanced poses without attending classes?
Learning from videos alone is risky but possible if you have excellent body awareness and are conservative in your progression. The major limitation? You can't feel your own misalignments. What feels like straight arms might be bent; what feels like a neutral spine might be arched. Without external feedback, you'll ingrain compensations that limit your progress and increase injury risk. A compromise approach works well: attend weekly or monthly classes for instruction and correction, then practice at home between sessions. If you're truly isolated from teachers, invest heavily in recording yourself, studying anatomy, and joining online communities where you can post videos for feedback. Never attempt a brand new advanced pose for the first time without having seen detailed instruction on setup, common errors, and safety precautions.
What's the difference between advanced yoga and intermediate yoga?
Intermediate yoga builds on basic poses by adding complexity—longer holds, more challenging variations, and beginning arm balances like Crow. You're still working within relatively safe ranges of motion. Advanced yoga pushes your body to its limits in multiple dimensions simultaneously. The poses require extreme flexibility, significant strength, precise balance, and sophisticated body control. The injury potential is substantially higher. Another key difference is sustainability—you can practice intermediate sequences daily without excessive fatigue, but advanced poses demand recovery time between sessions. The mental component differs too; advanced practice requires confronting fear (of falling, of injury) and developing patience that extends across years, not weeks.
Do I need to be naturally flexible to do advanced poses?
Natural flexibility helps but isn't required for most advanced poses. Many arm balances and inversions depend more on strength and technique than flexibility. Handstand, Crow, and Peacock are accessible to people with average flexibility who build sufficient strength. However, poses like King Pigeon, Lotus variations, and deep backbends do have flexibility requirements that some body types can't achieve regardless of training. Your bone structure determines your ultimate range of motion—no amount of stretching changes how your femur fits into your hip socket. The good news? Flexibility improves significantly with consistent practice. Most people have far more potential range of motion than they've currently developed. The key is patient, progressive stretching combined with strengthening the muscles that control your new range.
Which advanced pose should I learn first?
Start with Handstand if your wrists and shoulders are healthy. It's challenging but relatively safe, and the skills transfer to many other advanced poses. The strength, balance, and body awareness you develop while learning Handstand accelerate progress in arm balances and other inversions. Got wrist issues? Start with Forearm Stand instead, though it requires more shoulder flexibility. For practitioners with strong hip flexibility but less upper body strength, consider advanced hip openers like Firefly as your entry point. Avoid starting with extreme backbends like Scorpion or King Pigeon—these should come after you've spent years developing the foundation. The worst choice? Picking a pose purely because it looks impressive on social media. Choose based on your current strengths and anatomical predispositions.
How often should I practice to progress to advanced levels?
Five to six days per week produces optimal progress for most people. This frequency allows daily skill reinforcement while providing adequate recovery. Your practice sessions don't need to be long—45 focused minutes beats 90 minutes of unfocused movement. Structure matters more than duration. Dedicate specific sessions to specific skills: Monday for arm balance work, Tuesday for backbending, Wednesday for hip opening, Thursday for inversions, Friday for integration, Saturday for longer holds and refinement. Sunday becomes your rest day or gentle restorative practice. Practicing seven days weekly often leads to overuse injuries because your connective tissue needs recovery time to remodel. Practicing less than four days weekly? Progress will be slow but still possible. Consistency matters more than intensity—practicing four days weekly for a year beats practicing daily for two months then burning out and quitting
Mastering advanced yoga poses requires honest assessment of your current capacity, methodical progression through preparatory stages, and patience that extends across years. The poses themselves are vehicles for developing qualities—discipline, body awareness, mental resilience—that extend far beyond the mat. Most practitioners never achieve the full expression of poses like Scorpion or King Pigeon, and that's perfectly fine. The value lies in the journey of exploring your body's potential while respecting its limits. Focus on building unshakeable foundations in intermediate poses, addressing your specific flexibility and strength limitations, and progressing conservatively with proper instruction. The advanced poses will come when your body is ready, not when your ego demands them.
Runners get tight hip flexors, stubborn calves, and underactive glutes from thousands of repetitive strides. This guide shows the best yoga poses for common running issues, when to do dynamic vs recovery yoga, a 15-minute cooldown sequence, and how often to practice for mobility without overstretching.
Struggling with tight hips, hamstrings, or shoulders? This guide explains why yoga improves flexibility better than static stretching—by retraining your nervous system and building strength at end range. Learn 12 essential poses, follow 15/30/45-minute routines, and avoid the mistakes that stall progress.
New to yoga? This beginner guide explains the real, science-backed benefits, the only gear that matters, and how to choose classes or practice at home. Learn 10 foundational poses with form cues, then follow a 20-minute routine—plus common mistakes to avoid and the best styles for your goals.
Back pain is common—but yoga can reduce pain and improve function when done right. Learn why it works for acute vs chronic pain, 8 proven relief poses, how often to practice, mistakes that worsen symptoms, when to seek yoga therapy, and posture/core habits that protect your spine daily.
The content on this website is provided for general informational and educational purposes related to health, yoga, fitness, and overall wellness. It is not intended to replace professional medical advice, diagnosis, or treatment.
All information, workout suggestions, yoga practices, nutrition tips, and wellness guidance shared on this site are for general reference only. Individual health conditions, fitness levels, and medical needs vary, and results may differ from person to person. Always consult a qualified healthcare provider before starting any new exercise program, dietary plan, or wellness routine.
We are not responsible for any errors or omissions, or for any outcomes resulting from the use of information presented on this website. Your health and fitness decisions should always be made in consultation with appropriate medical and fitness professionals.